Sunday, March 29, 2015

Bringing Back Sunday Dinner: Slow Cooker Coconut Chicken Curry

So almost every week I try to make Sunday dinner. There are always some exceptions like Super Bowl, and Easter, but you get the just. There are some nights when my Sunday dinner plans get moved to Saturday because what I wanted to make on Saturday needs 24 hours for the flavors to meld together. So this gave me the chance to make two dinners in one night so that I actually didn't have to cook tonight. I don't care who you are that's a total winning deal right there! 

It wasn't a bad thing really, but this wasn't my favorite dish that I've made. It wasn't bad, but I'm totally spoiled by the AMAZING Mr. Curry Indian Food that I used to eat when I worked downtown St. Louis. If you EVER get a chance to eat there I highly suggest it! Lunch for under $10 plus it's seriously addicting. Part of me thinks that they slip some crack in there to get people to keep coming back. It's seriously THAT good! They also have a restaurant in Edwardsville, IL too for the people on the IL side of the river. All I can say is that I could eat there once a week and be one happy camper!

I found the recipe here if you'd like printable instructions:


Ingredients: 
2 lbs , 3 1/3 oz boneless skinless chicken breast cut into large cubes
1 whole onion, peeled and halved
2-3 cloves of garlic
1 whole small green bell pepper, seeded and quartered
1 can (156ml) tomato paste
1 can (about 400ml) coconut milk
1 1/2 teaspoon of salt
1 Tbsp curry powder
1 Tbsp Garam Masala (Indian Spice Mix)
2 whole dry red chili peppers (optional for extra heat)
2 Tbsp water
1 1/2 Tbsp cornstarch 
1 bunch of coriander

Go ahead and start putting all your ingredients into your food processor.
(except chili peppers, water, cornstarch, and coriander)
It's going to be a tight fit!  
Process together until it's "smoothish". Yes,
it says "smoothish." O.o
Okay so I couldn't find Garam Masala so I winged it
with this stuff….
Cut up and add your chicken to your crock pot.
Smother your chicken with your mixture.

Set it to low for about 6 hours.
An hour before serving, mix together water and cornstarch
until the cornstarch is completely disolved.
Add it to the chicken curry and mix well.
Place the lid back on for the rest of the cooking time.

 Serve on top of steamed white rice (we made double the batch of rice), decorate with lots of chopped coriander and enjoy. 

So that's the recipe; I'm always trying to get my kids to eat new things, especially ethnic food that I enjoy so much. This recipe wasn't bad, I think I'm going to try it again after I run to the Indian Grocery off of Grand Ave in the city to see if they have any Garam Masala so I can make this the right way. I also added some butter to it, not a lot, just about 2 Tbsp's worth. The Indian Masala that I get at Mr. Curry's always taste so buttery! Figured what the hell…it couldn't hurt it. Honestly, all in all it was pretty healthy, Mitch liked it, but said it lacked something that he couldn't put his finger on. Maybe it was the lack of Garam Masala…Roo hated it, Soph didn't mind it, and Claire…well that girl will eat anything! She's like Mikey! She likes it! She likes it! I also heard that my dad is making this tonight too up in the UP! So I'll get his feedback as well…wonder if he had trouble finding that Garam Masala too.

Tonight we actually had a recipe that my Mother-in-law makes that I just love, and that turned out super awesome! Chicken and Wild Rice, I will definitely have to make again, and post it for you all to see. It's wicked easy to make, and super awesome for the taste buds, the only drawback is that for it to turn out to be as awesome as when she makes it you have to let it sit for 24 hours to let all the flavors meld together. It's worth it I tell you…every minute of it!

Plus this whole "cooking" thing I've got going on now is spreading to the neighbors. I like to share my leftovers with Lisa, my totally awesome neighbor. It helps to get more feedback then just Mitch and the kids. Plus when I bake that too seems to make its way across the street as well. It feels good to cook and bake for others. It's a really good feeling. 

Till next time! 

Saturday, March 28, 2015

Project: Pallet Cedar Chest

Pallets are magical things even though you may not believe it. I'm quite sure that not many people would use the word "magical" to describe a pallet, but that's exactly what I think of when I see one. There are SO many ways to repurpose such a thing, that it is incredible to think that people just throw them around like they are worthless pieces of junk.  You can salvage some awesome wood from these!

I was lucky enough to be able to get some pallets for free from a very sweet guy named Adam Linneman who owns a local Lawn and Landscaping business in Waterloo, IL. He was so incredibly sweet to let me take as many as I could fit into our Pilot. So today I'm going to finally get to share with you what we made from those pallets; if memory serves we had six of them. 
Here's a link to his webpage if you are ever in need of lawn and landscaping needs:

He's amazing!

So you all know that I am a serious Pinterest Junkie, and I have a whole entire boards dedicated to Projects, Ideas, and things that I've Tried & Tested! I found this great pin that will lead you to some amazing examples of what you can do with those pallets you see laying around. With some elbow grease, some time, some help from awesome people if you aren't as handy with wood projects like I am, you too might be able to create something as awesome as our Pallet Cedar Chest!
Here's just one of the many links I looked to to grab ideas!


I had seen on one of the many pins that I have hoarded away, an idea to turn pallets into a chest. I LOVE furniture! I love to make and repurpose furniture, the only problem is (and it's a big one) I'm not real handy when it comes to wood. I would love to have my own wood shop someday, and build AMAZING pieces on my own, but until then I lovingly look to Mitch and his dad for help.

So Mitch took all the pallets apart, this took some time given all the nails that needed to be removed, then we took the pieces over to his dad. His dad, also named Mitch, was SO awesome, and over the winter months took the time to glue all of the pallet pieces together into sheets! After he was done, he cut the sheets to the diameters that we needed, and shaped out the box. He had extra wood hanging around his shop, so he built this box to last!

This is what it looked like after all the pieces were glued, and nailed together.

With its top

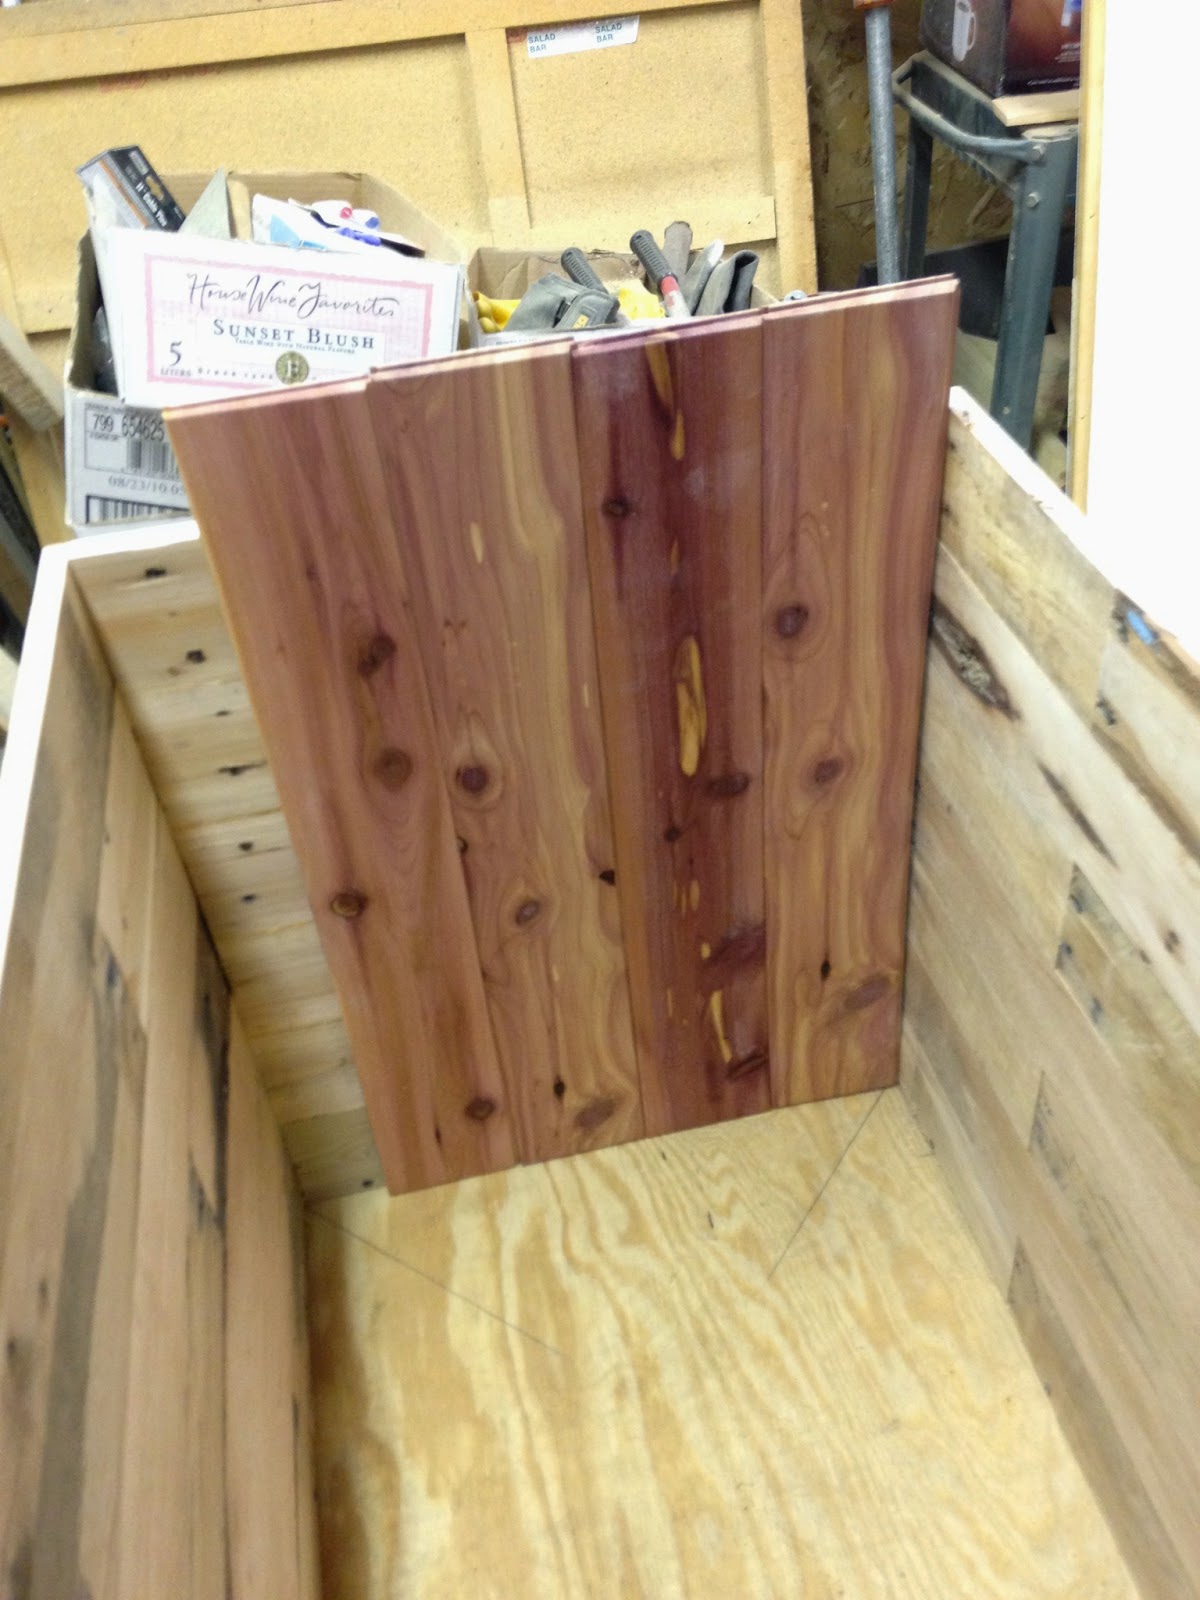
We decided to line it with cedar. It was about $80,
but it was worth it, and smells amazing!

Mitch and Mitch

They make a great team!

The bottom where we decided to add feet.

It's not totally complete yet, but super close!
So I wanted to add a personal touch to our cedar chest, and it seriously took me over two months to come up with something that I thought would be quite lovely. I'm happy with the way it turned out. It was my first time wood burning, and I'm honestly so pleased with it that I might wood burn more items in the future! The gift ideas could be endless!

Graphite wings and a stamped B, then wood burned into the top.

Mitch put a base around the lid to give it a finished look.

Stained and polyurethaned, it looks nice in our room.

It's a subtle look, but I love it none the less.

So there is our project! I hope it gives you some ideas on how to repurpose other things you may see laying around. It's always a great accomplishment to get something like this finished. Seriously, I give ALL the credit to Mitch and his dad! They did a FANTASTIC job, and I love the fact that we have something built by hand, by the both of them in our house! Makes it 10X's more special. I know that we will have this piece of furniture in our family for generations! <3 


Friday, March 20, 2015

Science Experiment - Crystalized Books

So a couple of weeks ago a friend of mine posted this link on my Facebook wall, and I was intrigued!

So in my science loving way I thought why the heck not try this too! The problem was that I couldn't bring myself to destroy a book, a true book, the ones that have actual words, characters, story lines, and a plots in them. I love books, I'm kind of an addict for books, and this went against all my book collecting (aka hoarding) attributes. I just couldn't do it. So I came up with a solution. A $1 solution! This nifty little "book" was a $1. It is a notebook, very small, 50 pages of blank space. There are no words to kill, no characters to annihilate, no story lines to destroy, and no plots to ruin. 

At this point it was go time!

My nifty $1 book. Bought it at JoAnn's Fabrics.
One Ball Jar 
You'll need Borax, boiling hot water,  and a measuring cup.
Add 3 Tbsp of Borax for every cup of water.
Stir till it is all disolved.

Add your book, and your Borax mixture to the jar.

This is where you have to be patient.

After about 4 hours worth of waiting you can
start to see little crystals forming on the outside.
The finished book.

One Ball Jar was killed in the crystalization of this book.

Yep, I had to break the Ball Jar in this experiment. I thought that was going to happen, but tried to see if it would come out, but it didn't. So I had to break the jar with a hammer. There are sacrifices in science, and the jar just happened to be one of them. 

I was always told you needed glass for this experiment, and I didn't have a glass container deep enough that would cover the whole book. Oh the things we do for science! I think it turned out okay. It was a fun experiment, and it's now small enough that I can put it on a shelf somewhere to become an awesome dust collector like the rest of my books. 

We'll be growing rocks in our next experiment. Stay tuned for more science experiments next week….


Sunday, March 15, 2015

Bringing Back Sunday Dinner - Shrimp Étouffée

So today definitely had a Cajun feel to it. We started off with 'The Princess and the Frog' for starters. I love this movie! We dug a little deeper with Mama Odie…

Mama Odie, got mad love for this cartoon!

The we were listening to some King Oliver's Creole Jazz Band on my Pandora Playlist. We had all the windows open, and being in St. Louis we are close to the Mississippi River so it's sorta kinda like being close to New Orleans. It's 73 degrees in March, I'll take it.  Plus last night I was sitting at my mother in laws kitchen table looking thru an old Gourmet Magazine from 2007, and ran across 'Pat's Crawfish Étouffée' recipe, and had a severe hankering for some awesome étouffée. Seriously people, of all my favorite creole food, étouffée is my hands down all time favorite. I've never met an étouffée I didn't like. My butt, hips, and thighs are kinda saying the same thing too…

Ingredients:
1 stick (1/2 cup) butter
3 cups minced onion
1 Tbsp minced garlic
1 Tbsp fresh thyme
1 Tbsp all-purpose flour
1 cup chicken broth
1 Tbsp Cajun seasoning
1 tsp paprika
1 tsp hot sauce
1 lb crawfish tails (we used shrimp)
1/4 cup chopped green onions
2 Tbsp chopped parsley

Note my surprise when I looked and we ACTUALLY had this!

Took some time to prep, but here we go…
Melt your butter in a medium saucepan over moderate heat.
Add onion and garlic, and cook until onion is softened, about 5 minutes.
Add thyme and flour, and cook stirring for one minute.
Whisk in chicken broth, Cajun seasoning, paprika, and hot sauce.
Bring to a boil, then reduce heat and simmer for two to three minutes.

Stir in crawfish tails, or in our case shrimp. 

Cover and simmer, stirring occasionally for 10 minutes. Stir
in the green onions and parsley before serving.  
While you wait try and keep the minions at bay…

Serve with steamed rice.

So I did look for a link for you all that you could just click on and et viola you'd have the recipe, but alas, I can't find one; just variations of this recipe from others. But I did switch out shrimp for crawfish, even though I love crawfish! It was just more expensive, and I didn't love it $3 more a lb expensive. Also I did add almost another 3/4 of a Tbsp of flour too to the recipe. It needed to be a little thicker so that's the only other tweak I made to this recipe. Also, note to you all, if you accidentally spill Cajun seasoning on your socked feet they will tingle oddly for an hour or so. Don't be alarmed. Yep, that's me, just call me Grace in the kitchen. I could have just taken them off, but then that would have been too easy, and who wants that! 

Enjoy this awesome recipe! Mitch said that this one was a keeper too! So far everything I've cooked he has decided that we can keep. I guess I'm slowly getting better at this whole cooking endeavor! Go me! Thank you Gourmet Magazine of December 2007 for making me look good! 

Friday, March 13, 2015

Project: Making Stamps For Crafting


Making stamps can be SO much fun if you have the right tools and materials. You truly only need four things to create your own stamps for scrapbooking, artistic card swaps, pocket letters, general arts and crafts projects, and anything you might go out and buy a stamp for. If you break down the cost of purchasing E-Z-Cut Printing Blocks, and a Gouge. It's cheaper to make your own hands down. Plus, when you are in dire need of a stamp that you just can't find, making your own is probably quicker than  hunting on the internet, looking for hours for what you want, not finding it, driving around to your local craft stores in search of it, ending up just frustrated, low on gas, and patience.  That's the boat I found myself in the other day. Until I found this great material called E-Z-Cut. 

Dick Blick sells it here:

You'll also need this:

What you'll need:
E-Z-Cut Printing Blocks
Lino Cutter (Gouge)
Pencil
Paper

This is all you need.

So I was looking on the internet for a particular stamp that I couldn't seem to find. I was not a happy camper, once I did find what I wanted it wasn't available or it was sold out. So Mitch told me about this great stuff called E-Z-Cut! HOLY SMOKES! So I got some, which was wicked easy to come by, got myself a gouge (aka Lino Cutter) went back and found the stamps that I wanted to duplicate, and went to it. See what happens when a little idea turns into a nice little project to keep me super busy!

One of the stamps that I thought was super cute!

This was what I really was looking for!!

So in order to do this grab some plain printer paper, nothing fancy, scrap will do as long as it's white. Go ahead and either draw it out your image free hand, copy the image, or trace it on to that white sheet of paper. Draw it just the way you want to use it. 

 If you draw out the image first you will know exactly how big of a box you will need to cut for your stamp. Cut the E-Z-Cut with a box cutter, or Exacto knife. E-Z-Cut is so soft that you only need to cut about half way thru, it will snap in half after that with little to no effort.

 Once you've got your image drawn, and your shape cut out of the E-Z-Cut, go ahead and flip your piece of paper over onto the top of the E-Z-Cut. You will need to apply some pressure to get your graphite from your pencil to transfer. I just used my fingers, and rubbed up and down on the sheet of paper. When you lift the paper up your image will transfer in the reverse. 

It will look like this.
Once you get your image transferred you can go ahead and get out your gouge or Lino Cutter. This is where you have to take your time. Anything that you want solid you need to cut around. Take the teapot for example. In the picture above, the teapot is red, if you want your ink to stick to the stamp you need to leave the surface of that portion alone. Anything in relief will not keep the ink. Take a look at the bottle, I wanted just the outline of the bottle so I carved out the middle of the bottle and just left the outside lines, the shading, and the cork.  

I practiced on the teapot first before carving out the bottle.

Once you are done it should look something like this.
The first go around with my stamps I used an old envelope in order to see where I might need to take more of the E-Z-Cut away with my gouge. If you look at my teapot in the right hand corner you will see that I didn't cut away enough and the ink transferred to the higher points of the stamp. Once I put ink on them and practiced I could see where they needed some tweaking here and some more digging there. You can see I had to do the same thing to the bottle too. Both sides on the right hand side needed to be taken down some more. Once you get the hang of this method the sky is the limit on how many stamps you can make for yourself. It's hard sometimes to find that PERFECT stamp, but with this material you are only limited by your imagination, and your patience for detail. 


I don't plan to go all Picasso on my stamps, but for the time being, using this material opens up a whole new world of awesomeness to play in. I might not be the greatest artist, or have a fancy cutting machine to give me those precise stamps that you can purchase at any number of craft stores, but this works for me, and that makes me super happy! Hope you enjoy it as much as I do! 

Sunday, March 8, 2015

Recipe : Homemade Ice Cream with Oreo Cookies


When I was little I remember my mom making homemade ice cream, Oreo homemade ice cream in fact, and it was the BEST stuff on the PLANET! It really was amazing because my mom is awesome at baking! The cool thing was that we didn't have an ice cream maker,  and we still got ice cream! These days if you catch a good sale at the super market you can pick up ice cream cheaper than you can make it, but you are only limited to the selection they have available. You could always go to DQ, Baskin Robbins, or Orange Leaf too for good ice cream. My all time favorite hands down "store bought" has to be from Culver's, but the caloric intake is thru the roof, which is why it tastes SO GOOD! This stuff, in my humble opinion, and if memory serves me right is just as good.  I called my mom up and asked her for the recipe she used to use way back in the day. She sent me the link you see below. So I figured since it's been warm the last couple of days that I would give home made ice cream a go! So here's our findings! 


Ingredients:
3 egg yolks
1 (14oz.) can Eagle Brand sweetened condensed milk
2 Tbsp water
4 tsp vanilla extract
1 Cup (or more) crushed Oreos
2 Cups whipping cream


If you'd like a printer friendly version please click here:

I whip up the whipping cream first.

Whip it until stiff peaks start to form.

Go ahead and set this aside.

Add your 3 egg yolks.

Your Eagle Brand sweetened condensed milk.

Add your water, and your vanilla and mix well.

Crush up your Oreo's. I definitely did more than 1 cup!!!

Add your whipped cream and stir well, line your 2 quart dish with foil.
I don't think you NEED to do this, but I've never tried it without the foil.

Cover it, and put into the freezer for at least 6 hours. 12 is better.
My memory DID NOT LIE - it was AWESOME! 
This stuff really is the best because I don't have the space or the time to house, and use an ice cream maker. The salt gets messy and the cold ice water is a wicked pain in the dupa! With this recipe you can seriously put anything into this mix…think about it…Girl Scout COOKIES! You could make your own Thin Mint Girl Scout Cookie Ice Cream whenever you wanted if you stocked up on Thin Mints for the whole year! A-MAZING! Red Velvet Ice Cream for my sister! The possibilities are endless!

Here's some other recipes you might want to try too: 
Chocolate Ice Cream:
2 Cups whipping cream
2 Tbsp vanilla extract
2 Tbsp of sugar (add or subtract to your liking)
1/4 Cup of Chocolate Syrup

Strawberry Ice Cream:
2 Cups whipping cream
2 Tbsp vanilla extract
2 Tbsp of sugar (add or subtract to your liking)
1/4 Strawberry Syrup, mix fresh or frozen strawberries into the ice cream

Chocolate Mint Ice Cream:
2 Cups whipping cream
2 Tbsp mint extract
2 Tbsp of Sugar (add or subtract to your liking)
Mix in dark or semisweet chocolate chips

S'Mores:
Use Chocolate Ice Cream recipe
 1/4 Cup of Marshmallow Cream
Graham Crackers crushed up
Chocolate chips
Stir ingredients until well mixed


Spring is almost here! Hope you enjoy this as much as I did!!